Quick Start
This section provides a brief overview of how to get started with Origami_tools. It covers the basic installation steps, key features, and a simple example to help you begin using the library effectively.
Installation
To install Origami_tools, you can use pip. Run the following command in your terminal:
pip install -i https://test.pypi.org/simple/ origami-tools
Create your first origami pattern
Here is a simple example to create a basic Miura-ori origami pattern using Origami_tools:
First import the necessary modules:
from origami_tools.Pattern import Pattern
from origami_tools.Geometry import *
import numpy as np
Define the parameters :
a = 20
b = 20
alpha = np.radians(60)

h = b * np.sin(alpha) # height
d = b * np.cos(alpha) # x offset
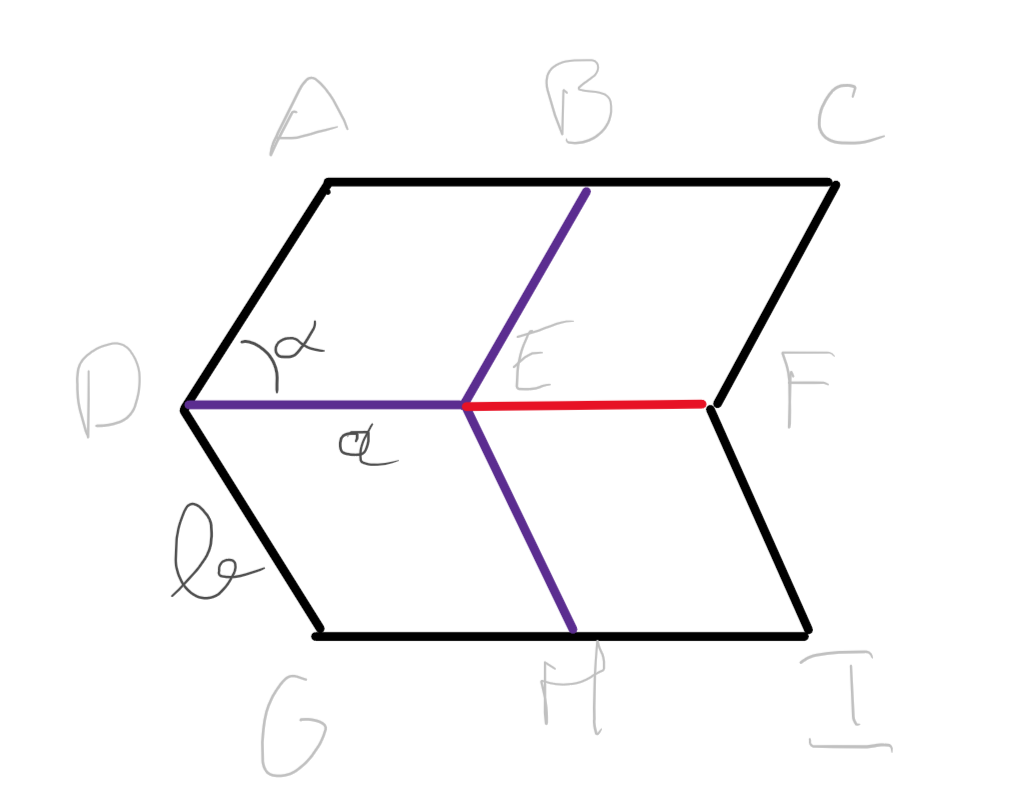
Create the Points
A = Point(d, 0)
B = A + Vec(a, 0)
C = B + Vec(a, 0)

D = Point(0, h)
E = Point(a, h)
F = Point(2 * a, h)

G = A + Vec(0, 2 * h)
H = B + Vec(0, 2 * h)
I = C + Vec(0, 2 * h)
Create the lines of the pattern
# create the exteriors lines (y is directed downwards)
exterior_lines = []
exterior_lines.extend([Line(A, C), Line(G, I)]) # top and bottom
exterior_lines.extend([Line(A, D), Line(D, G)]) # left side
exterior_lines.extend([Line(C, F), Line(F, I)]) # right side

# create the montain folds
mountain_folds = [Line(E, F)]

# create the valley folds
valley_folds = [Line(B, E), Line(D, E), Line(E, H)]
Then create the pattern and add the shapes and folds :
my_origami = Pattern() # create a blank pattern
my_origami.w_h(d + 2 * a, 2 * h) # set width and height
my_origami.add_shapes(exterior_lines) # add the exterior lines
my_origami.add_folds(mountain_folds, fold_type='m') # add mountain folds
my_origami.add_folds(valley_folds, fold_type='v') # add valley folds
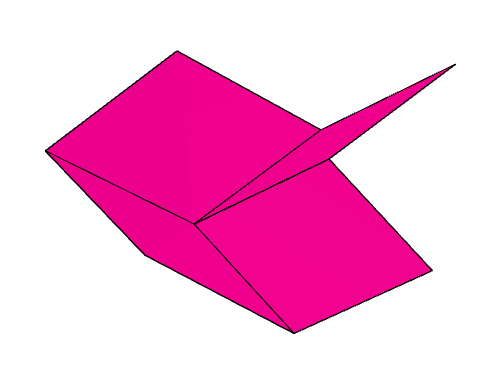
my_origami.show() # display the pattern
Which should give you the following output :

We can save the pattern as an SVG file :
my_origami.save_SVG("Path\\to\\your\\directory", "Miura_ori")
And can import it in Origami Simulator
Setting laser cutting parameters
You can also create different parameters to change the color, thickness, and other laser cutting settings using the LaserParams module.
fold_cut = LaserParam("#FF0000", name="fold_cut", ep=0.2, full=False, dash_length=5, dash_full_ratio=0.5)
cut = LaserParam("#00FF00", name="cut", ep=1, full=True)

params = ParamList.from_list([fold_cut, cut], profile="example")
params.save_profile(dir_path="path\\to\\your\\directory") # optional: save the profile for later use. You can load it with ParamList.load_profile
When you save the parameters, you can let the dir_path empty to save it in the default material profiles directory of Origami_tools. You can see and change this directory with the functions get_material_path() and set_material_path():
from origami_tools import set_material_path, get_material_path
print(get_material_path()) # prints the current material profiles directory
set_material_path("path\\to\\your\\directory") # change the material profiles directory
print(get_material_path()) # prints the updated material profiles directory
Once you have the parameters set, you can use them in your origami pattern:
my_origami = Pattern(name="Miura_ori", param_list=params)
my_origami.w_h(d + 2 * a, 2 * h)
my_origami.add_shapes(exterior_lines, param="cut")
my_origami.add_folds(mountain_folds, fold_type='m', param="fold_cut")
my_origami.add_folds(valley_folds, fold_type='v', param="fold_cut")
my_origami.show("cut")
my_origami.save_SVG("path\\to\\your\\directory", "Miura_ori_cut")
which gives you this pattern :
